Pages

Saturday 27 April 2013

Digital Imaging: Week 5

tracing

texture
This lesson is more interesting than the previous one. I waiting to learn using the tools quite long already. I thought interior architect student will never get to learn it.

We learn how to use the WACOM tablet...
basically we learn how to use pen tool to make the shapes and use brush tool to do some shaping and rendering. Then we learn how to stylize the image and so.

Next, learning to make effect and texture, basically just play around with the filter and get the desirable effect.

Is really fun to learn this. Playing around with texture can make a lot of effect

Saturday 20 April 2013

Digital Imaging: Week 4

I love this chapter...
hehe.. cause is easy to understand and to play.
Making the COPY & PASTE looks real in the other photo.. as if it was over there.


We learn how to use match colour
The purpose of match colour is to match the colour of the new layer to the background colour.
This will make the picture looks realistic with the background.
Next..
we learn how to use blending mood.
There is a list of blending on the left.
Most commonly use is screen and multiply.
Screen is to remove black background and multiply is to remove white background
Next is the opacity...
Changing the opacity will make the image looking transparent...
Giving a translucent effect.
Is quite interesting to play with the image with this few technique.


Saturday 13 April 2013

Digital Imaging: Week 3

Hair on fire
This chapter is a bit hard to do due to the hair...
My work did not turn up that nice, not skilful enough
Is a bit hard to explain... therefore I put up my lecturer tutorial over here.
This is the link: https://www.youtube.com/watch?v=NQlj6obutmg

I learn to use colour range to do a easier to do the selection and duplicate the image within the selection.. is really and awesome topic. Not easy to learn.

Saturday 6 April 2013

Digital Imaging: Week 2

The next topic of the week is CLONING~~~~~~~~~~~~~
along with masking... cool technique to "play safe"...
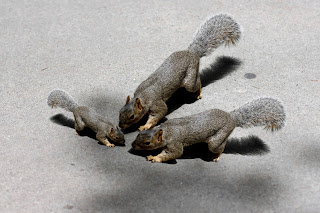
1. cloning multiple squirrel ~~
2. remove advertisement
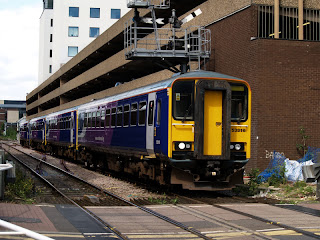
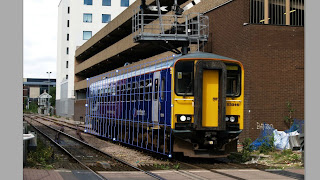
3.Making long long train or building
This chapter is magic~
making things disappear or cloning the object.

This is the tools to clone your picture.
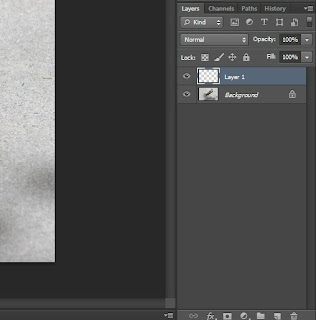
Before you start cloning the object. Is better to start a new layer first. Next...
start cloning the object.
Move your mouse to the object that you want to clone. Then press "Alt".
Now release "Alt" then move to a new place to start cloning by just clicking the mouse.
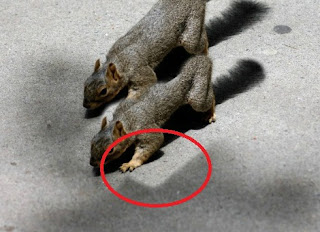
If you realise that the object you clone is including the background you did not want.
The background doesn't looks matching....
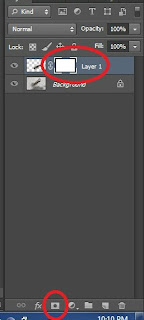
Now go to your layer and click "add to mask"
then you should get something like above.
Click on the white layer (as the red oval drawn above)
Next... click your brush tools.
Make sure the colour is black(to hide)..
Start to erasing your background you did not want.
If you accidentally erase your object...
NO WORRIES...
switch your colour to white to reveal back your object...
Here you go... learning cloning and masking already. (claps claps)

Next is cloning in perspective.
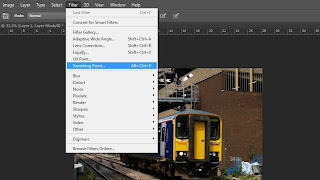
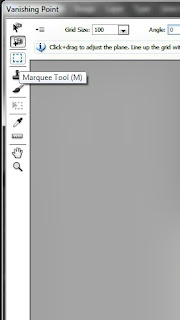
Go to filter, then click varnishing point.
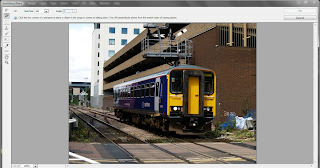
You will see this kind of window...
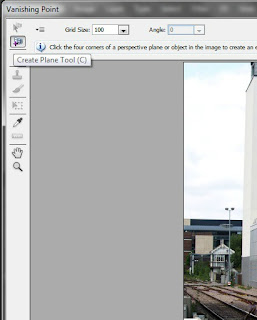
Click create plane tool to start making perspective.
Drag the plane until behind.....
tada...
the more blue line you have, the better your perspective view are.
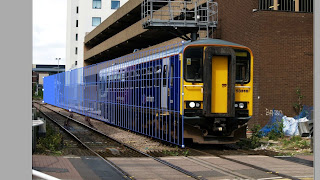
Now, click marquee tool
Then. select your image to copy.
Copy it within the blue plan.
Once done, click okay.
Then you will be able to get something like this...